Please share what’s complicated. I’ll try to simplify whatever your feel is complicated.
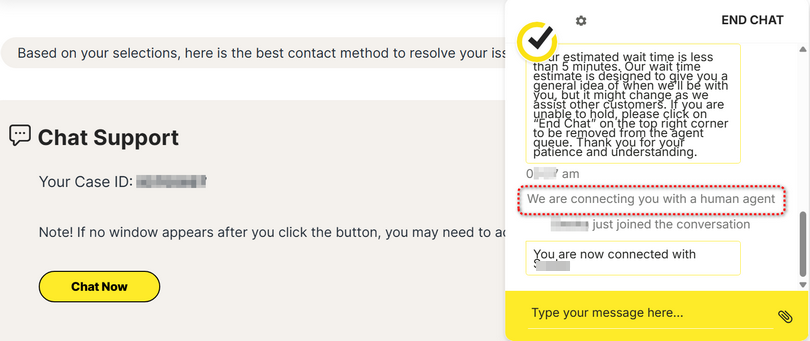
are you United States? Contact Norton Support→https://support.norton.com/sp/en/us/home/current/contact Note:Norton Support access/presentation may vary. Note:The idea is to get past Norton presets & bots…click any presets. Try to find Get help or Need more help? or Contact us
Note: the thread is mostly…example: screenshots…verifying your email address… connecting with a human…easy peasy
I don’t have the time right now to try to get through levels of beginner support. I have already seen much more expert advice in this forum, even though the problem hasn’t been solved.
My immediate workaround: I have just turned off Norton VPN and substituted Encrypt.me VPN. I have a subscription because I use it on my iPhones. It’s reliable and there’s no problem printing. On my other Windows 11 laptop, I use NordVPN, also no problem
I’m unsure what Norton plan you’re running.
Just for my benefit…you turned off Norton 360 VPN or you turned off Norton VPN Standard/Plus/Ultimate?
Thanks
AI Mode
When your VPN is active, you can’t print because the VPN encrypts and reroutes all your internet traffic through a secure tunnel, isolating your device from the local network your printer is on. Since your computer is no longer communicating directly with other devices on your home network, it cannot find or send print jobs to the printer.
Many VPN applications include features that allow local network access while the VPN is active. This is the most secure method, as it doesn’t require disabling your VPN.
Enable LAN Access: Look in your VPN settings for an option such as “Allow access to local network devices” or “Enable LAN access”. For NordVPN, this is called “Stay invisible on LAN” and must be turned off.
Use Split Tunneling: If your VPN offers split tunneling, you can specify that only certain apps (like your web browser) use the VPN tunnel while other apps (like your printer’s software) connect directly to your local network. ------------------------------------------
Setting up split tunneling allows you to maintain your VPN’s secure connection for general internet traffic while enabling direct access to your local network for your printer. Most modern VPN clients offer this feature in one of two ways: either by excluding specific applications or by excluding specific IP addresses or IP ranges.
Method 1: Excluding the printer’s IP address
This approach is highly reliable and is available in most major VPN clients that support split tunneling. It works by telling the VPN to ignore all traffic destined for your printer’s IP address.
Find your printer’s IP address:
Windows: Disconnect your VPN. Go to Control Panel > Devices and Printers. Right-click your printer, choose Properties, and look under the Ports or Web Services tab.
Mac: Disconnect your VPN. Go to System Settings > Printers & Scanners. Select your printer and click Options & Supplies > General. The IP address should be listed.
Printer Menu: Many printers can print a “Network Configuration Page” from their on-device menu, which will list its IP address.
Add the IP address to your VPN client’s split tunnel settings:
NordVPN (Windows):
Open the NordVPN app and click the Settings cogwheel icon.
Navigate to Split tunneling.
Turn the feature on and then add your printer’s IP address to the “Excluded IP addresses” list.
Proton VPN:
Open the app and go to Settings > Features > Split tunneling.
Turn on split tunneling in Standard mode to exclude specific IP addresses from the VPN.
Add your printer’s IP address to the “Excluded IP addresses” list.
ExpressVPN:
Open the app and go to Options > Split Tunneling.
Enable split tunneling and manage your applications. Use the option to add or remove IP addresses for exclusion.
Note: ExpressVPN’s support for split tunneling varies by operating system, with macOS 11 and later no longer supporting the feature.
Surfshark (Bypasser):
Open the app and go to Settings > VPN Settings > Bypasser.
Turn the feature on and select Add websites or IP addresses.
Add your printer’s IP address to bypass the VPN.
Method 2: Excluding the printer software application
This method is less effective for network printers, as it doesn’t solve the core issue of a device being isolated from the local network. However, it can work if your printer uses a local software or driver that you can add as an exclusion.
Find the printer software’s executable file (.exe on Windows):
The file is often located in a directory such as C:\Program Files or C:\Program Files (x86).
You can also right-click the shortcut to your printer’s management utility and select “Open file location.”
Add the software to your VPN client’s split tunnel settings:
NordVPN (Windows): In the Split tunneling settings, click Add apps and find your printer’s software executable in the list.
Proton VPN: In the Split tunneling settings, you can add your printer’s software to the “Excluded apps” list.
ExpressVPN: Use the split tunneling menu to exclude the application from the VPN tunnel.
If you are still unable to print after configuring split tunneling, try these additional steps:
Add the printer manually by its IP address: After you have correctly configured split tunneling in your VPN client, add the printer to your computer again, but this time use its IP address instead of letting the computer search for it. This can bypass any name-resolution issues caused by the VPN.
Temporarily disable the VPN: As a final troubleshooting step, disconnect your VPN, send the print job, and then reconnect once the job is in the printer’s queue.
-----------------------------------------
In a head-to-head comparison, the standalone Norton VPN plans are better than the VPN feature included in Norton 360. The key difference is the number of features and options available, as the standalone plans offer more advanced capabilities for users who prioritize privacy and connection control.
----------------------------------------------
Hello @RandySea2
fwiw ~ another attempt at shorter and simpler here
OK, this is just bizarre. But first, just to clarify, the machine with the problem I’ve been writing about is a 4 year old Dell XPS13 with Windows 11 Home, my wife’s laptop. As far as I can tell, it is running Norton 360 Deluxe.
Here is the bizarre thing. I wrote that my workaround was to use Encrypt.me as the VPN. It worked fine for allowing printing. However, I couldn’t get it to start the VPN automatically. Wouldn’t be problem for me, but my wife (who travels a lot for business and stays in hotels), has no idea of VPN or how it works.
So this morning I uninstalled Encrypt.me. But I couldn’t run the Norton VPN. Then I remembered that I had disabled the Norton VPN service, so I re-enabled it, and set to start automatically.
After a reboot, the Norton VPN started up and allowed printing. I rebooted twice. The first time it allowed printing again, with Secure Boot showing On. This worked one more time. Now it’s back to not working. That is, my two printers both show as “Offline” and I can’t print.
I may just have to leave her machine with VPN off. She needs to print when she’s home, at least.
are you Norton 360 v25.10.10528?
and by “rebooted” you mean Restart or Shut down?
Do you run W11 Fast Start Up enabled?
No idea whether Fast Start Up is involved…just not a fan of Fast Start Up. Just me.
Did you test with Secure Boot disabled? …as test.
Yes, it’s recommended to keep Secure Boot enabled to benefit from its security protections.
AI Mode
Secure Boot can potentially conflict with the VPN feature in Norton 360. Secure Boot is a security feature that verifies software and drivers during the boot-up process, and if the VPN’s drivers are not digitally signed or an issue with the signature occurs, Secure Boot can block them.
While Norton is a major, reputable developer that should have properly signed drivers, conflicts can still arise due to issues like outdated software or an overzealous security setting.
Most reputable VPNs, including Norton, should provide digitally signed drivers to avoid conflicts. However, driver signing issues or other software conflicts can still cause problems.
Disabling Secure Boot significantly increases your system’s vulnerability to sophisticated malware, particularly bootkits. Secure Boot acts as a guard at the earliest stage of your computer’s startup, and bypassing it means removing a crucial layer of security built into modern operating systems like Windows.
Disabling Secure Boot on a system designed for it, especially one running Windows 11, can cause system instability. Windows 11 has a specific requirement for Secure Boot to be enabled.
Blocked updates: The OS may refuse to install important security updates if Secure Boot is disabled, leaving your system vulnerable to other threats.
Reduced integrity: Since the OS can no longer verify the integrity of the boot process, its overall security posture is weakened.